DIY synth guru Scott Rider, aka the Old Crow, has announced a new DIY project, inspired by the circuits of the Moog Minimoog and the Yamaha CS-80.
The two main goals for the ‘Crowminius‘ project were:
- to make a new synth in the style of a Minimoog 204D (“model D”) for a good friend, who lost his circa 1974 original Mini to hurricane Katrina; and
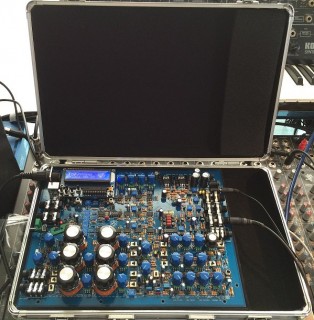
- to create a synth that would fit in a compact aluminum attache case.
Here’s an audio demo of the Crowminius in action:

Here’s what Rider has to say about the new synth:
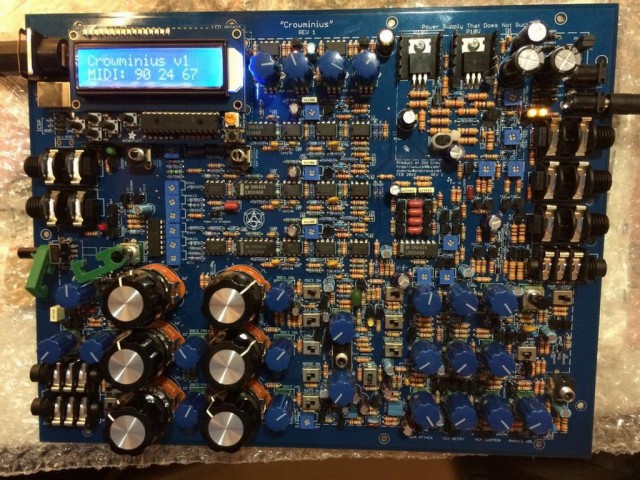
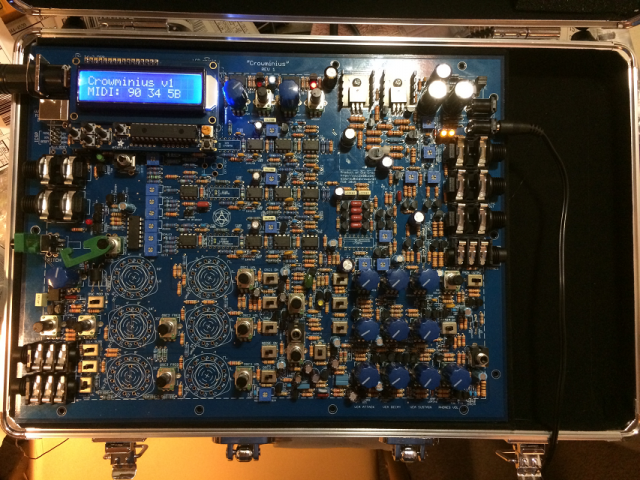
Crowminius is a compact recreation of the 204D, except my Atmel ATMEGA328P/MCP4822-based MIDI interface takes place of the old 44-note Pratt-Read keyboard. Otherwise, every control and jack on the model D is represented here.
The controls are extremely compact as the entire system has to fit on a 8.5? x 11? circuit board and given the inset border needed for mounting the board in the case the actual area available was 7.5? x 10?. Thus far all the subsystems are checking out as shown by this 98% assembled first unit.
An Adafruit LCD monitors the MIDI stream for me; that is a MIDI Note-On code for key 0x34 at velocity 0x5B. I had a spare DAC channel available so one of the MIDI options will be filter modulation by various MIDI sources, such as key velocity.
By request I added a feature the original model D did not have: PWM of the oscillators.
Oscillator #3 was typically used in “control mode” as a low-frequency modulation generator to add vibrato to the first two oscillators or additionally add filter modulation, but there was no routing to provide pulse-width modulation of the primary tone-generating oscillators. To address this (lack of a) feature I devised a pair of simple low-frequency triangle-waveshape oscillators, one for each tone generator.
Separate oscillator PWM is one of the many details that gives the Yamaha CS-80 the rich sonic texture that made it such a great instrument, so I decided to use that concept for Crowminius PWM.
Crowminius FAQ
 Here’s Rider’s FAQ’s for the Crowminius:
The circuit board is 8.5″ x 11″ (216mm x 280mm), the size of the DuinoKit Essentials PC board the aluminum case of which settled the form factor goal for the Crowminius project.
The green things are some 3D-printed shelf clips I made that serve as makeshift pitch/mod levers. I will print better ones meant for this.
There are three LFO LEDs, two are behind the PWM pots (top middle), the 3rd shows the rate of the control osc. and is over by the pitch/mod wheel pots.
The vactrol/LDR is for MIDI modwheel action, which is kind of experimental at the moment.
The A440 reference is not a Wein bridge sine oscillator, but rather is a DDS table-lookup PWM sine tone generated on the MIDI microcontroller.
USB MIDI is planned.
The power supply will run on a single 12VAC, 250mA wall transformer. The power supply that does not suck mode involves the use of two 12VAC wall transformers so as to provide full-wave rectification.
The DAC is scaled to provide 5 octaves, F1 to F6 over a 4.096-Volt range. The DAC’s 2nd channel will operate the filter cutoff for assignable key velocity or whatever.
I did not use ua726s as they are a pain to get and the thought of exposed parts heated to 80C meant someone would get burned. LM3046s are fine; there is a tempco resistor under the three arrays for the VCOs.
The filter resonance pot is in fact a 50K reverse-log type, but I provided for using a linear pot+resistor to cheeseball it.
Yes I will be offering bare boards. They will be $100.00. I have to correct a few cosmetic issues (mostly reversed knob and switch actions) but every part came from Digikey, Jameco, Mouser or Small Bear.
via Old Crow, Muffwiggler

Amazing and fantastic. I’m going to build one of these into a full size Mini Moog case. At long last a cheapish Mini Moog hopefully costing no more then £400.
He said the parts bill is $190. Add on the board and case, and still pretty affordable. (Unless you count many hours of soldering!)
All-inclusive my total cash outlay is about US$350 including various shipping charges, the aluminum case and the knobs. I bought enough parts to build 5 of these (2 prototypes, my friend’s unit and a couple for a rainy day) so I was able to average down a bit for the $300 figure. Still, better than the $3,500 I see on ebay.
Interested in selling one of the 5 that you built?
Hi, great synth DIY,
I am in the Italian city Rome, you can order one or two motherboards complete? you can also know the price?
I await your news ..
Thanks a lot….
Good job.
max
Oh wow – this I want. never built one before, but would love to try this. Stupid question, probably, but would the board come with a full list of parts, etc?
This sounds beautiful.
Does it pick up unwanted radio interference like the original Minimoog?
Hopefully ! XD
I’d certainly be interested in getting one of these to build. Sounds great and looks a fun project!
The “shut up and take my money” from Futurama comes to mind. This website is so bad for my wallet…..
Also interested… especially with a nice Schematic/BOM and a friendly link to Mouser or somewhere 🙂
I’d happy pay a bit extra for a full kit too! Sounds great – Nice work!!
Excellent. Now who can I find to teach me how to solder…?
https://www.youtube.com/results?search_query=how+to+solder+circuit+boards
Youtube and one of the many ‘learn to solder’ kits available will teach you everything you need to know about soldering (well, there will be a lot you’ll learn by actually *doing* it, but the theory isn’t hard).
Remember what Daddy always told me : “Keep your tip clean.”
This is just the motivation I needed to learn soldering! Looking forward to getting a parts lists for this 🙂
This looks awesome. That being said, i’d not recommend something like this for a first soldering project. Practice with some diy 555 timer square wave oscillators first i’d say. Pleanty of youtube guides on those, and the parts are pennies. Wont be a major headache when you mess up.
After you build this, you’ll be in shape to tackle his four voice OB clone!
OMG why would you say something like that! Now I want that one too!!
Ooops guys.. If you need to learn soldering I will have to point out a few other bits. Like how to adjust stuff using an oscilloscope, matching transitors etc..etc.. There’s heaps to learn before moving into a project like this. A good place to start out is MusicFromOuterSpace. I’ve buillt stuff, but I still havent dared trying to build an oscillator yet… Apart from the heterodyne thingy inside that PAiA theremax that is.. Read up on the basics first. The Old Crow is a legend and I think it’s a project worth while.
Somebody put together a full kit for this, please!
I like doing DIY projects, but don’t have the time to source parts with half a dozen vendors and hope that I get everything right. I’d bet that the audience for full DIY kits is much bigger overall than the audience for PCBs.
Lots of times, people make a parts bill that you can import straight in to Mouser, or wherever.
Which is what I did here. BoMs for Digikey and Mouser than can be used directly to place orders.
“I’d bet that the audience for full DIY kits is much bigger overall than the audience for PCBs”
The FCC considers full kits to be the same as a finished standalone product and require certification, which costs $10,000 if you are very good and experienced, or $20,000 or more if you are a first timer. This is not possible for small runs or companies.
Selling boards though is clearly just selling a component and dodges the requirements.
It’s kind of a big deal since fines will be in the hundreds of thousands of dollars.
How much extra would you pay for this?
That’s one beefy sounding attache case!
I dunno where to go first, Radio Shack or the luggage shop?
Hit RadioShack first. The luggage shop will still be around later.
if radio shack still in business
Hi folks, Crow here. I will provide several BoMs: a google doc spreadsheet, and shared BoMs on Digikey and Mouser suitable for ordering the lists of parts from each for a Crowminius. A couple parts must be obtained from Small Bear, Mammoth, etc. but 99% of them are from Digikey/Mouser. The general spreadsheet should assist in ordering from other places as needed. I figure boards to be in stock mid to late April. I have to build one more to verify everything is what it should be from the 1.1 board revision once the boards coem in, then to DIYland it goes.
Hey Crow, will there be a front panel of some sort?
A front panel sized to at least the lower half of the board wasn’t in mind when I made this thing, but it should be possible. Others already plan to make a full-size control panel and use board-mounted headers to wire between the panel and board. My main issue is getting a certain rotary switch from Alpha that no one seems to stock, which is why I have a factory quote in. The standard switch is widely available but I wanted a bottom-mount type to lower the selector knob heights.
Thanks Crow. I’m afraid I don’t quite understand your answer. I know nothing about building electronics. If I bought this I’d simply hand it to someone else to build. So are you saying only the lower half of the board will take a panel? But a full panel could be made if the knobs and switches etc were wired to duplicate knobs etc on a new panel?
I refer to a panel that mounts just above the circuit board so as to still fit in the case. Now if you want a larger control panel full-size switches, pots and jacks would be mounted to it and wired to headers installed on the main board where the board-mounted controls normally go. This means you want a bigger overall enclosure but that is up the carpenters in our midst. 😉
Ok, got it. Will you produce this panel or will it be up to the individual?
If I bought all the parts, including a case, what would be a fair price USD for someone to build it for me? I’ve done a bit of soldering, but nothing beyond that. Any thoughts?
I’d totally be willing to assemble one for you for about $200 – (to cover my PCB and some parts)
It would probably be easier to do two at once.
edit double post
Sounds beautiful. And that demo REALLY highlights the difference between what you can do with a real honest-to-goodness analog rig and what you CAN’T do with an iPad digital emulation. Sick!!
Looking at the density of parts on this beast it looks like a brain-wrecker to build. It is hard to imagine the degree of satisfaction that would come from such an accomplishment!!
Man those just tuned oscillators and various improvisations just sound gorgeous!! Pure analog delights.
I hereby nominate Crowminius for this millennium’s Bang-for-buck award.
eurorack please!!! sounds great!
This is really neat, I have always been impressed by people who can make a solid Minimoog clone. I do wonder though how difficult(and I guess sturdy) it would be to take this and try and fit it in a proper sized Minimoog case?
Is the synth monophonic or poly? If it is based on CS80 should be poly, and in the demo i heard 2 distinct voices somewhere
It is a monophonic instrument. I am playing paraphonic tricks by tuning the three oscillators to a major chord to play things like the star wars riff.
This sounds amazing. Good work! Hopefully my DIY skills will be up to the challenge.
There are a lot of parts, but the build is not difficult so much as tedious. Over half the parts are resistors. They only slightly tricky parts are the three 100-Ohm 3300ppm compensating resistors in the 0805 SMT package, and even those are easy (easier, really, once you get the hang of it). Even those parts have a throughhole alternate.
This is so glorious… I’m so happy to have accidentally stumbled on this post. Crow, is there a website with the boards for sale/BOM? I hope its not sold out!! *fingers crossed*
How many boards do you have left? I am very interested 🙂
My first batch (25 boards) is sold out as I only announced it on Muffwiggler. There might be a few extra batch 1 boards depending on if I receive any overage from the board house. This is not guaranteed, however. Check the “order here” link at http://www.cs80.com/crowminius to see if anything is available, but I won’t actually know until 4/17/15 when they are scheduled to arrive.
The production batch (aka batch 2) I will order after I build one rev1.1 board to verify everything tweaked from v1.0. I expect to be placing this order by the end of April. –Crow
Ok so there will be more… Phew.. I would love to be a part of a batch two pre-order if you ever do that.
Where can I find the parts list?
once i tried to build a Paia Fatman myself… then i noticed im badly colourblind :(.. … well, the result was… the Fatman never worked.. .. but i would LOVE to build synths myself like this wonderful sounding Crowminius….
it sounds great – makes me want to learn how to solder and read schematics too….
I have the 1.1.3 board and I have materials from mouser/Digikey…. Looks like the BoMs is for the1.1 version. Do you have the reference location for my board anywhere? I have been searching around the sites and can’t find it. Thanks!